First open Photoshop. Next press file and new to create your animation. Change the dimensions to 400X600 (or whatever you think your dimensions should be.) Then press the "T" type tool on the left hand corner. Type your name and change the font, color, size, etc...
Next drag your name down (on the right hand side) to create a new layer. Hide the previous by pressing the small eyeball icon. Press the eraser (on the left) and start erasing your name. Start at the right and work your way to the left in a way that your name would be written.
Continue to erase your name starting at the end. But each time you have to hide the previous, or it will not work. This takes a while but keep erasing until you finish.
Once you have finished erasing your animation until you have a blank screen (like the picture to the left), go to 'window' at the top and scroll down to timeline to get your timeline at the bottom.
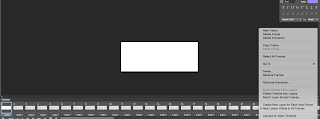
Click the little button on the timeline on the right, then select 'make frames from layers' to get your animation layers in your timeline. Then go into the same button once more and click 'reverse frames' to make it look like it's writing forwards not in reverse.
 Optional:
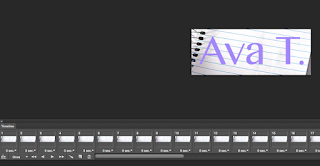
 Your animation is .done, but if you want, you can add a background. Go to Morguefile.com and search a background you would like, and save your it. Open your animation up in Photoshop, press your background layer, go to file then place, and select the image you chose. Crop it to the size you need.
Your animation is now complete! You want to save it for the web as a GIF. Go File, save for web, then save it. Now you can impress your friends with an amazing animation of your name being written.


 Optional: Your animation is .done, but if you want, you can add a background. Go to Morguefile.com and search a background you would like, and save your it. Open your animation up in Photoshop, press your background layer, go to file then place, and select the image you chose. Crop it to the size you need.
Good job!
ReplyDelete